 Help Center
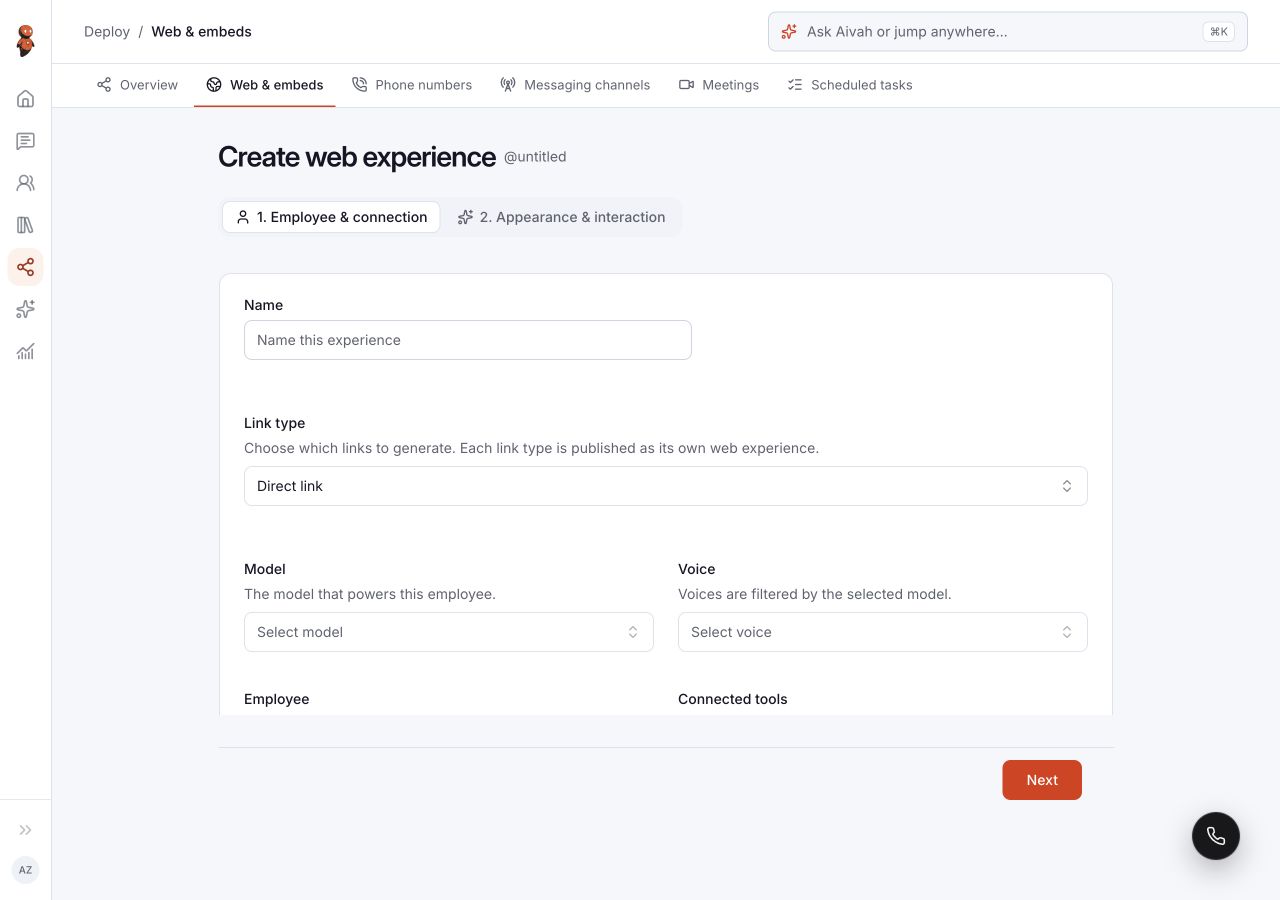
The Link type selector in Deploy → Web & embeds → Create experience offers three ways to present an employee. Choose the type for the visitor's destination, then test the actual published entry point.
Before you begin
Prepare the web experience and test its employee in Chat. For a website placement, identify who manages the site and use a test page before changing the main visitor journey.
Steps
1. Choose a link type
In Employee & connection, open Link type.
| Choice | Intended placement |
|---|---|
| Direct link | A standalone experience opened from a link. |
| Iframe embed | An experience placed within a website page. |
| Chat bubble | A conversation entry shown as a website chat bubble. |
The form says each selected type is published as its own web experience. Review every intended destination separately.
 View full screenshot ↗
2. Review the interaction settings
Complete the employee, model, voice, and tool choices. In Appearance & interaction, choose the character or companion, Start with mode, and Logo appearance. Check how these choices will fit the intended website placement.
3. Use the published delivery instructions
After publishing completes, use the link or installation instructions provided for that experience. Do not construct an embed URL or installation snippet from the address of the creation form.
For a website placement, use the provided instructions on the test page and inspect that page before rolling the change out. Share installation details only with the person who needs them; never add provider credentials or private account values.
4. Test the actual entry point
Open the link or website page in a private browser window to check visitor access. Test a narrow and a wide screen. Confirm that the conversation, start/stop controls, consent text, and surrounding website remain usable.
Test each enabled function separately: a question with a known answer, voice, a lead submission, human handoff, and any connected action. Check the resulting records or destination rather than treating a successful page load as a complete test.
5. Track later changes
Record where the link or embed is used. After changing the experience or website, reopen those entry points and repeat the relevant tests. Before replacing or removing a placement, check every page or message that depends on it.
Expected result
The chosen link type matches the destination. The actual published entry point must show the intended employee and remain usable in the visitor conditions you tested.
Status meanings
Selecting a link type prepares a delivery choice. Publish starts a separate operation. A published configuration and a correctly installed, working website placement are separate checks.
Usage credit impact
Visitor conversations, voice, and connected actions may affect usage. Use current account information to budget for the expected audience; a page view alone does not establish the cost of a conversation.
Information stored or shared
Links can be copied or forwarded. An embedded experience is used within a website controlled by its owner. Use appropriate knowledge and tools for that audience, and check access before placing internal information behind an entry point.
Limits and permanent actions
Website layout and access depend on the actual destination. Do not assume a password, expiry, domain restriction, or specific edit capability exists without checking it. A configuration change or removal can affect distributed entry points; keep their locations recorded.
Common problems and recovery
- The experience does not appear: compare the current delivery instructions with the test page and confirm the correct site version is displayed.
- Controls are clipped or covered: inspect the website's available space at narrow and wide sizes before changing the placement.
- The wrong employee or appearance loads: review the configuration for that specific entry point in Web & embeds.
- A function fails after the page opens: test it separately in Chat and at the visitor entry point, and record the visible error and route for support.
Next step
Review lead capture and consent before collecting visitor information or allowing connected actions.