 Help Center
Start with one job and one approved source. Saving an employee and seeing Completed are preparation milestones; you still need to check its answers before sharing it.
Before you begin
Write a job definition, choose an owner, and prepare a small source with facts you can verify. Keep connected tools unselected for an answers-only first test.
Steps
1. Open Hire employee
Open Employees → Hire employee.
2. Choose Templates, Custom, or Local knowledge
Templates supplies role-based starting instructions. Custom lets you write the job yourself or use Ask AI to draft it. Local knowledge presents a name and document-upload flow. Review the fields again after changing the starting point.
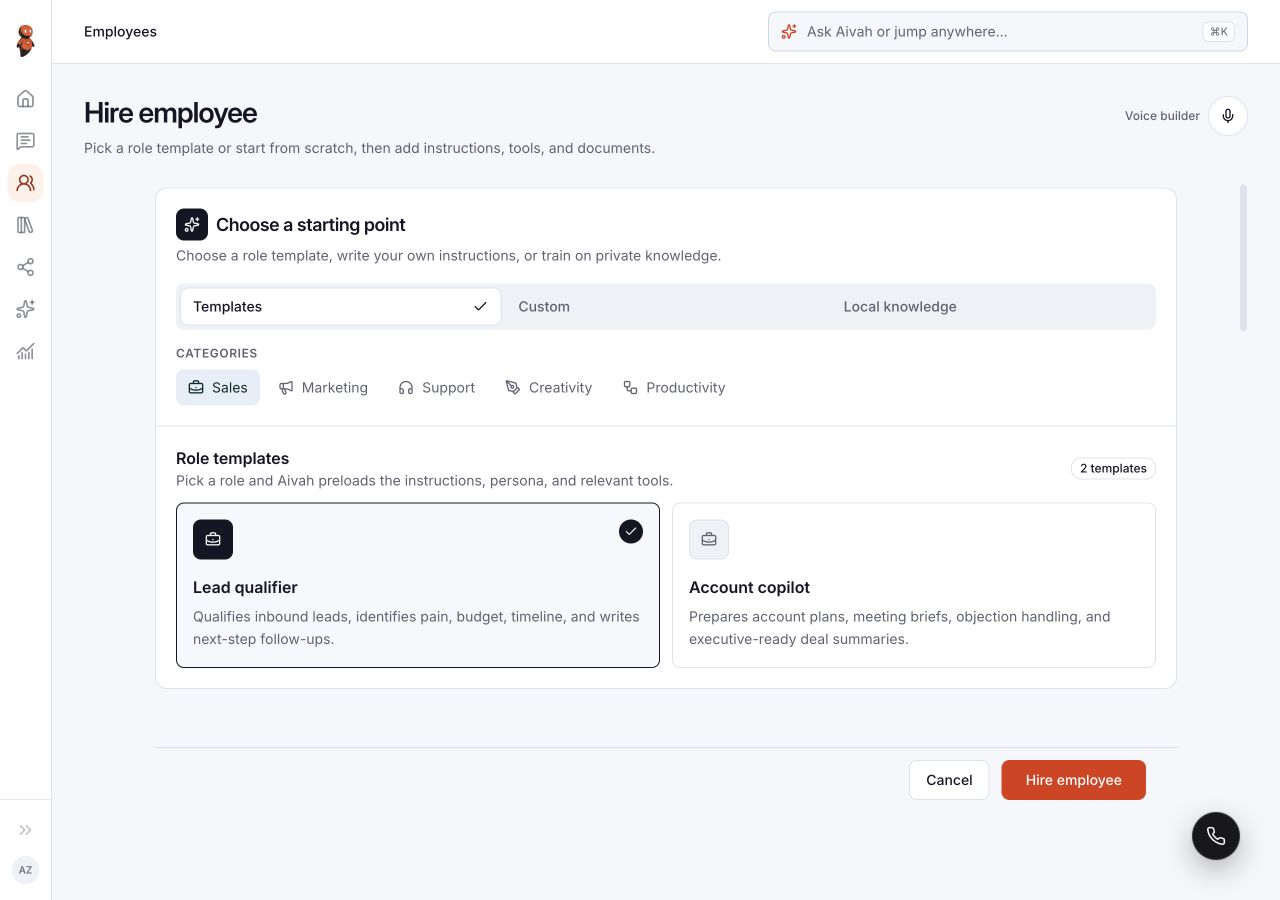 View full screenshot ↗
3. Name the employee clearly
Choose a name that identifies its job. For a practice example, use Cedar Cafe FAQ and keep all source material fictional.
4. Decide whether it is a Presenter
The Presenter capability is for one PDF or video; the form says website links and text are not used for that capability. Leave it off for the text-based FAQ example. The edit form says Presenter is set when hiring and cannot be changed there.
5. Write and review the instructions
Enter the job, source boundary, and handoff rule in Instructions. Review any Ask AI draft before using it.
Answer questions using only the supplied Cedar Cafe FAQ. Do not guess facts missing from the source. If you cannot answer, say that the information is not available and ask the visitor to contact the cafe team. Do not use external tools or take actions.
Example only. Copying does not change your agent or send anything.
6. Set the personality
Use Persona for tone and working style, such as “Friendly, concise, and clear.” Put factual business rules in the source and behavioral boundaries in Instructions.
7. Add business knowledge
Under Documents, choose Add document. The Custom flow offers Add files, Add website link, and Add text. Local knowledge offers file upload. For the practice example, add this text:
Cedar Cafe is a fictional practice business. It opens Monday to Friday from 9 AM to 5 PM. It is closed on weekends. Its practice reference code is CEDAR-DEMO. This source does not contain delivery or booking information.
Example only. Copying does not change your agent or send anything.
8. Select only necessary connected actions
Review Connected tools, including any template selections. The form allows up to three connected tools and directs you to connect an app in Connected tools first. Leave the practice employee with no tools selected.
9. Create and wait for readiness
Review the name, capability, instructions, persona, tools, and documents, then choose Hire employee. Open the saved employee and review Training status in Overview and individual source statuses in Knowledge. Use Refresh status to check their current state.
10. Test the example privately
Use Talk to [employee name] in Overview to open Chat. Ask for weekday hours and the practice code, then compare the answer with the source. Ask about delivery too: the source does not support an answer.
A completed source can still produce an incorrect or unsupported response. Keep the employee private until it passes your source checks. Record incorrect responses rather than assuming another attempt fixes the cause.
11. Add a face or voice only if you need one
Use Characters, backgrounds, and voices to prepare appearance resources. Test text and voice separately.
12. Prepare your real version before sharing
Replace the fictional material with approved information, retest, and review the launch checklist. Deploy to website is a setup entry point, not confirmation that visitors can use the employee.
Expected result
A saved employee has the intended configuration and source. Your test record identifies which answers match the source and which still need work.
Status meanings
Completed describes training or source processing. No tools assigned means the employee's Tools view has no assigned apps. Neither status establishes answer accuracy or deployment readiness.
Usage credit impact
Ask AI, training, conversations, and connected activity may use credits. Check the displayed balance and notices before a long test.
Information stored or shared
The employee stores the configuration and knowledge you submit. Connected apps can receive information when used. Keep the practice example free of customer data and credentials.
Limits and permanent actions
Presenter and tool choices need review before hiring. Do not assume every hiring choice can be changed in Edit. Upload only supported files you are permitted to use; review the current file guidance in the form.
Common problems and recovery
- Required fields are missing: correct the displayed validation before hiring.
- Processing has not completed: inspect the employee and source statuses before starting the answer test.
- The answer contradicts a completed source: record the prompt, response, source fact, employee, and time, then review testing and improvement.
Next step
Set knowledge, instructions, and actions, then manage, test, and improve.