 Help Center
Open Library to manage the reusable resources that shape how an employee looks and sounds. Character and background catalogs are separate from the voice library and from the conversation where you select them.
Before you begin
Prepare images or recordings you are allowed to use. Use a clear portrait for a character, a suitable landscape image or video for a background, and a clean single-speaker sample for voice preparation. Obtain the speaker's permission before using their voice.
Steps
1. Open Library
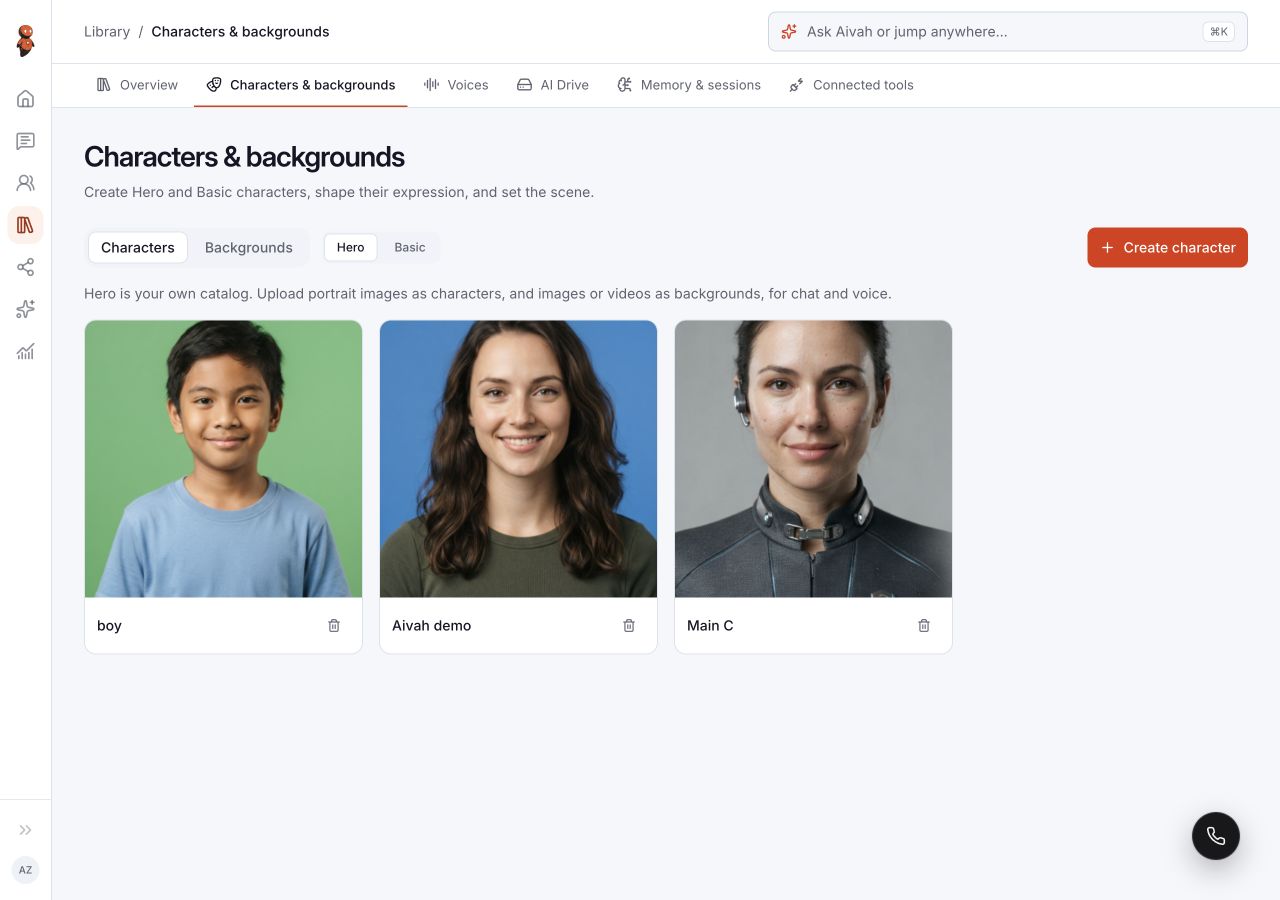
Choose Library → Characters & backgrounds. The page has Characters and Backgrounds tabs, each with Hero and Basic choices.
2. Choose a catalog
Hero is your own catalog. Basic is a shared, read-only catalog. Browse the rendered cards and choose the catalog appropriate to your task; Basic cards do not offer the same editing controls as owned Hero items.
 View full screenshot ↗
3. Open Create character
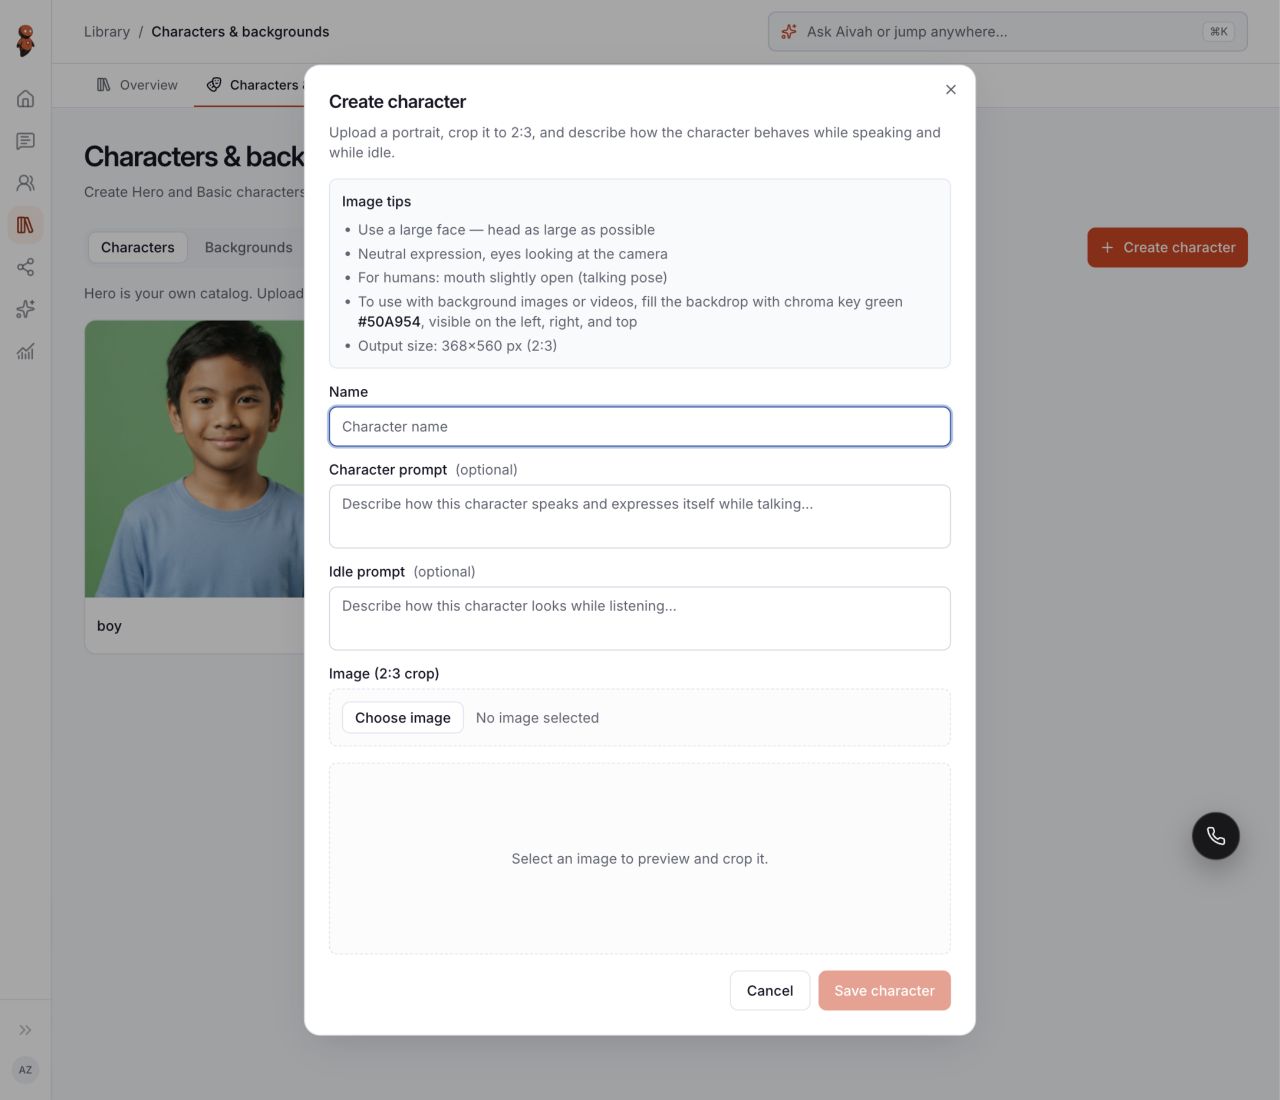
In Characters → Hero, choose Create character. Enter Name, then add an optional Character prompt for speaking behavior and an optional Idle prompt for listening or idle behavior.
4. Prepare the character image
Choose Choose image and follow the portrait and 2:3 crop guidance shown in the form. Use a large, clear face and review the framing. For background compositing, the form recommends a chroma green backdrop with color #50A954 visible around the subject.
Scroll to the bottom of the form to find Cancel and Save character. Save remains disabled while the required inputs are missing. After submitting permitted media, check the actual save result and catalog entry before using the character.
 View full screenshot ↗
5. Review character editing
Open an owned character's edit control to change its name, Character prompt, or Idle prompt. The form states that changing the image requires creating a new character. Check the displayed result after saving; do not assume closing the form saved an edit.
6. Prepare a background
Open Backgrounds → Hero → Upload background. Enter Name and choose an image or video. The form recommends landscape 9:5, crops images to 1440×800, and lists MP4, WebM, or MOV videos up to 50 MB. Muted looping clips are recommended.
An existing background's edit form allows renaming. To replace the media, upload a new background. Check the completed upload separately before assigning it to a conversation.
7. Open Voices
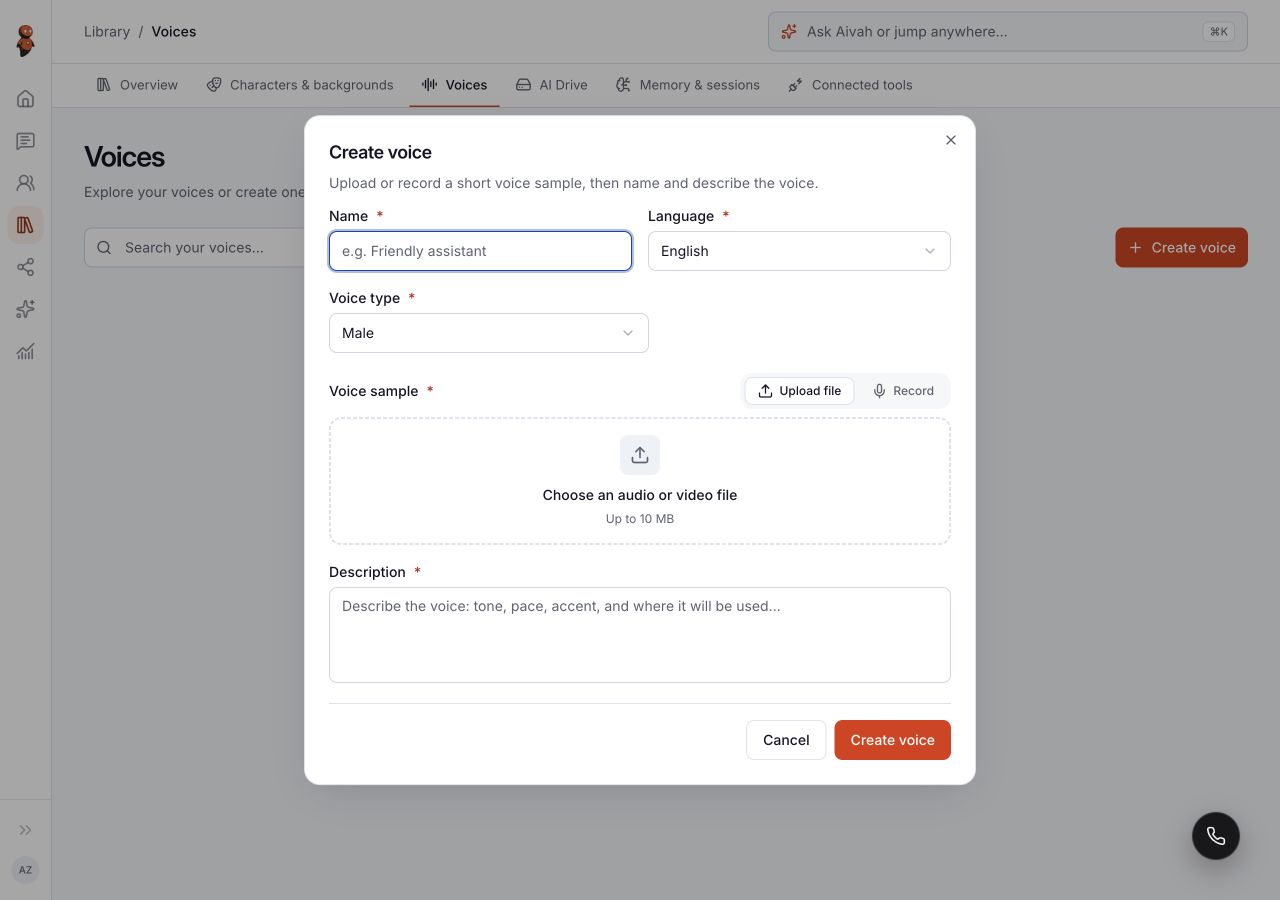
Choose Library → Voices → Create voice. Complete Name, Language, Voice type, and Description. Use Upload file for an audio or video sample up to 10 MB, or Record for the displayed microphone-recording flow. Record mode describes a sample of up to one minute.
Only start recording when you are ready to grant microphone access. An empty submission shows validation for required voice details and the sample. Form validation does not establish that a voice has been created or is ready to speak.
 View full screenshot ↗
8. Select resources in Chat
In Chat, open Conversation settings → Character for the Character and background picker. Review Model and Voice separately. See Use a character in Chat and voice view.
9. Test the complete experience
Check portrait framing, background contrast, and readable controls on desktop and mobile. Test actual speech separately from loading the avatar. Repeat the intended visitor journey before using the appearance publicly.
Expected result
You can distinguish Hero and Basic resources and prepare the current character, background, and voice forms. Confirm upload, creation, assignment, and spoken output from their actual results before treating the complete experience as ready.
Status meanings
A disabled save button means the form is not ready to submit. A rendered catalog card confirms that the item is visible in that catalog. Neither proves that a later voice or visual conversation works correctly.
Usage credit impact
Voice creation, media processing, and conversations may use credits. Review the current notices before uploading, recording, or starting a long test.
Information stored or shared
Submitted names, prompts, images, videos, and recordings can become reusable account resources. Selected resources can appear in conversations or shared experiences. Keep sensitive details out of filenames, prompts, and recordings.
Limits and permanent actions
Basic is read-only. Owned-item deletion can affect later use, so check assignments before deleting. Keep original permitted media; image replacement is not provided by the character or background rename form.
Common problems and recovery
- You cannot edit a catalog item: check whether Basic is selected.
- Save is disabled: complete the required fields and media selection.
- A portrait is framed badly: review the crop or create a replacement image-based character.
- Voice setup is complete but you hear nothing: test microphone and output settings in an actual conversation; the form alone is not a speech test.
Next step
Use a character in Chat and voice view, then review the launch checklist.