 Help Center
Use Deploy → Web & embeds → Create experience to prepare an employee for a web entry point. The form has two steps: Employee & connection and Appearance & interaction.
Before you begin
Test the employee in Chat with questions you can verify. Review its knowledge and allowed tools, choose the visitor's job, and decide where the experience should appear. Training marked Completed is a reason to begin testing, not proof that answers are correct.
Steps
1. Open Create experience
Open Deploy → Web & embeds. Review the existing list, then choose Create experience for a new setup.
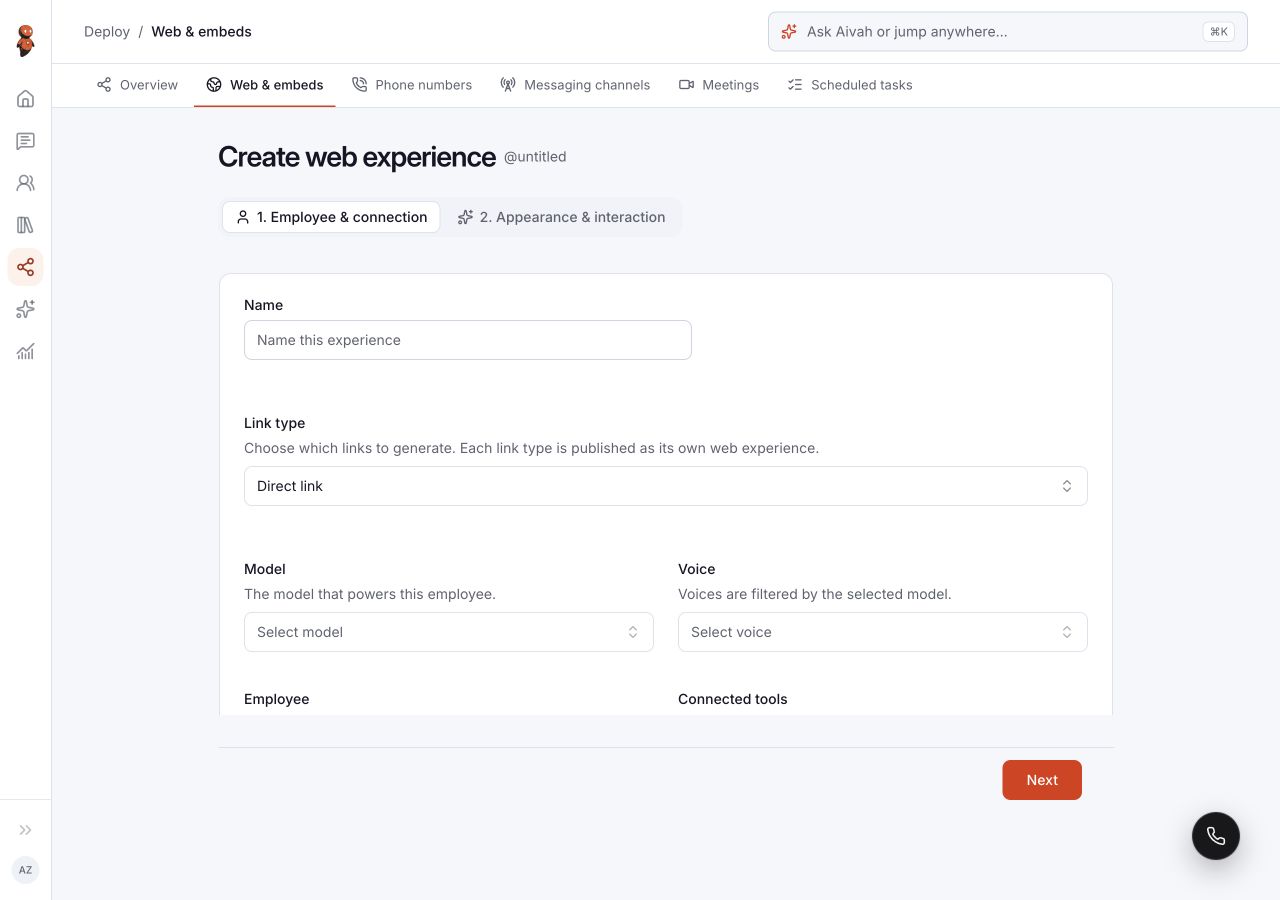
2. Set Employee & connection
Enter a Name of at least two characters. Review:
- Link type: Direct link, Iframe embed, or Chat bubble.
- Model: the model behind the experience.
- Voice: choices are filtered by the selected model.
- Employee: the employee that should handle the conversation.
- Connected tools: the tools this experience should use.
The form says each selected link type is published as its own web experience. See link and embed choices before selecting the destination.
 View full screenshot ↗
3. Add a lead form if needed
Select an employee before using Add lead capture form. Prepare only the fields needed for the visitor's task. Follow lead capture and consent to review the form.
Choose Next to continue.
4. Set Appearance & interaction
Choose Characters or Companion avatars. In Characters, review the available Hero or Basic catalog and the optional Character background. Wait for the selected item to load before judging its appearance.
Under Default mode, use Start with to choose Text chat or Voice chat. Under Logo, choose Default logo, Upload my logo, or No logo. Selecting your own logo reveals its upload control.
5. Review before publishing
Use Back to review the employee, model, voice, tools, and lead fields. Check that the appearance and opening mode suit the same visitor task. Choose Publish only when ready to make the configured experience available, then wait for the displayed result before using any resulting link or installation instructions.
6. Check the visitor experience
Test the actual entry point on a phone and a wider screen. Check text, voice if enabled, lead fields, handoff, and each permitted action separately. Confirm the expected result where it belongs; do not rely on a conversational claim that an outside action succeeded.
Expected result
The setup choices describe one clear visitor task. Before launch, the published entry point must open the intended configuration and pass its visitor tests.
Status meanings
Next moves between setup steps; it does not publish the experience. The presence of Publish does not mean publishing has completed. Review the displayed result and open the actual entry point to check delivery.
Usage credit impact
Visitor activity may use credits or connected services. Review current account usage information and set a budget before making an experience widely available.
Information stored or shared
The name, appearance, voice, lead fields, and conversation are intended for visitors. Review the selected knowledge and tools so the employee does not expose internal information through that entry point.
Limits and permanent actions
Treat publication as a separate action from preparing a draft. Verify visitor access rather than assuming a link is restricted. Keep an inventory of website placements and distributed links, and test them again after configuration changes.
Common problems and recovery
- Name validation appears: enter at least two characters and review the field again before continuing.
- Add lead capture form is disabled: choose an Employee first.
- The voice list differs: check the selected Model and wait for the filtered voices to load.
- The selected appearance is missing: wait for the catalog to load and confirm the intended category and item.
- Publication or delivery is unclear: check the current Web & embeds list and displayed result before creating a duplicate.
Next step
Choose and test a direct link or website embed, then review lead capture and public actions.