 Help Center
Chat brings messages, the selected employee, files, results, and voice controls together. Start with a text question whose answer you can check before moving to a larger task.
Before you begin
Choose the employee and an approved test source. Use fictional files for practice. If you plan to speak, use a quiet space and decide whether to grant microphone access; opening voice view does not turn the microphone on.
Steps
1. Start a clean conversation
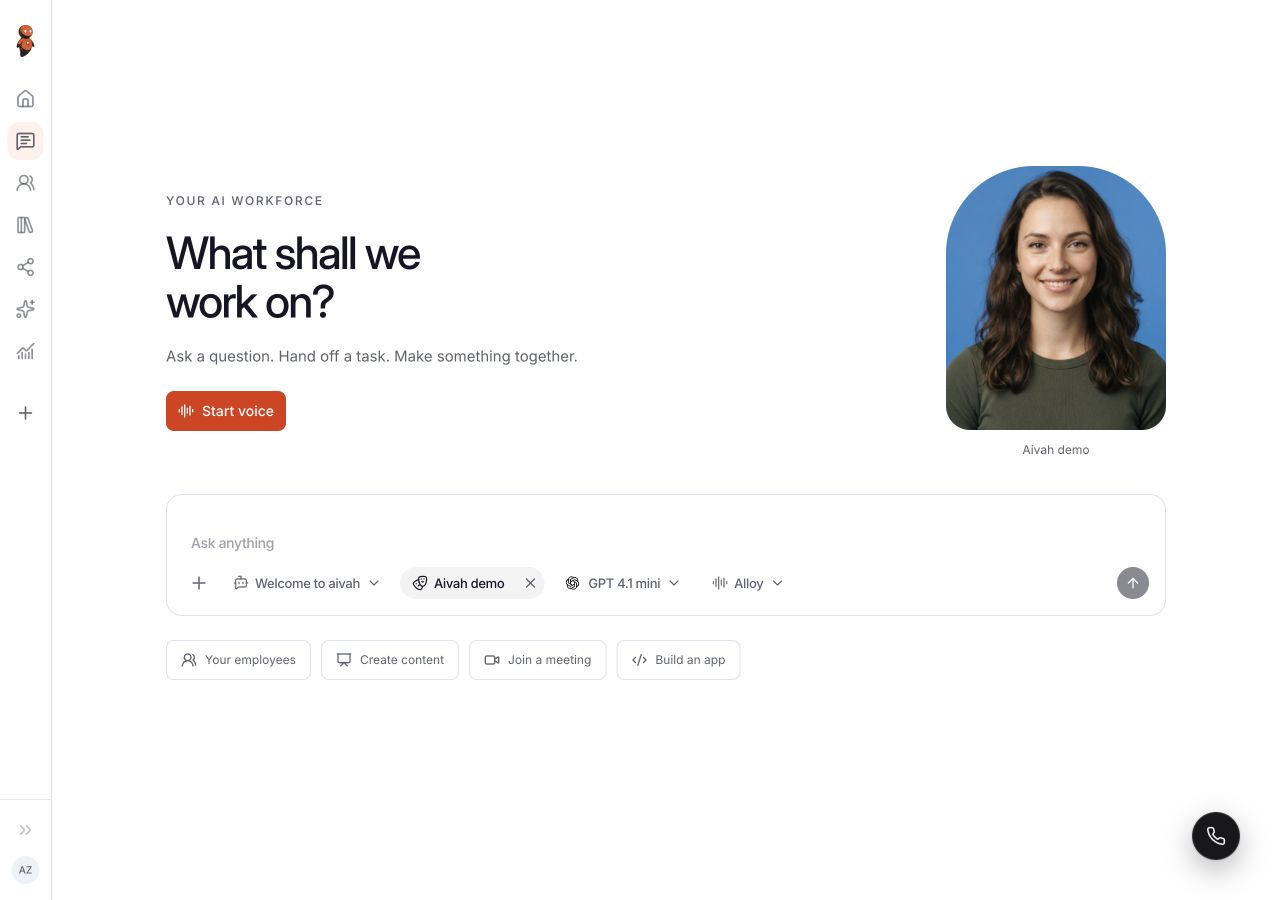
Open Chat and use New conversation in the conversation list. On the starting screen, choose Employee, Character, Model, and Voice as needed. In an existing conversation, open Conversation settings for appearance, model, and voice choices.
 View full screenshot ↗
2. Send a useful first message
Enter a clear request in the message box and choose Send message. Include the source or context the employee should use and the format you want back. Compare factual answers with your approved source; fluent wording and a completed response are not evidence of correctness.
Use Copy message beside a message to copy it. Paste it into your notes and check that the intended message was copied. Keep the prompt and the response together when recording a problem.
For feedback about an answer, contact support with the question, the copied response, and what you expected. Reaction buttons were not available in the Chat conversation checked for this guide; their availability in other views has not been verified.
3. Attach one supported file
Choose Attach files or Attach photos and files, select the file, and add a written request. Review the selected filename before sending; remove an unintended attachment with its remove control.
Wait for processing and check the result card. A processed document can show Ready to review, Preview, Download, and Open preview. For TXT files, the preview dialog may say inline preview is unavailable and offer Open document or Open in new tab instead. Use that option to read the original file.
A file opening correctly confirms receipt and access to that file. If the employee says it cannot access the source, check whether the file belongs to this conversation or was added to the employee's knowledge. Open the original file, verify its contents, and test a specific fact again. Keep the response for support if the source remains unavailable.
4. Review results
Open Results to inspect work associated with the conversation. Open the individual preview or result control before relying on its contents. For other saved work, see Find generated work.
5. Use voice
Choose Start voice, Start voice call, or Start voice conversation, depending on the current view. The Voice conversation overlay has Audio view and Show avatar controls for switching its presentation.
Ready · Mic off or Turn on your microphone to speak means speech input is still off. Choose Turn on microphone and grant browser access only when you are ready to speak. Test a short exchange and listen to the response; a ready overlay alone does not confirm audible speech or microphone capture.
Use Back to chat to return to the conversation view and End call to end the call. If you hear echo, use headphones and check other active audio sessions.
6. Show the employee when appearance matters
Use Show employee or Hide employee to control the side panel. In Conversation settings, open Character to choose from the Character and background picker. See Use a character in Chat and voice view for the visual controls.
7. Test presentation controls when applicable
If you hired a Presenter, check its intended PDF or video and any presentation or quiz controls available in the conversation. Test navigation and answer accuracy before using the presentation with an audience. Selecting Presenter does not establish that those outcomes work for your material.
8. Start fresh after changing employees
Use a new conversation for important comparisons after changing the employee or its source. Confirm the selected employee before sending the next test.
Expected result
You can send and copy messages, inspect a processed file, open Results, show or hide the employee, and switch the voice overlay between audio and avatar views. Check answer correctness and spoken audio separately before relying on them.
Status meanings
- Ready · Mic off: the displayed session is ready while microphone input is off.
- Connecting or Waking up your employee: the session is still preparing.
- Connection lost. Reconnecting: the session has not yet recovered.
- Ready to review: the result is available for inspection; it is not an accuracy judgment.
Usage credit impact
Conversations, voice, file processing, and generated work may use credits. Check the balance and any current notices before a long session or repeated request.
Information stored or shared
Messages and processed files can appear in the conversation and its history. Connected actions can share information with an outside service. Review attachments before sending and avoid unnecessary personal information.
Limits and permanent actions
Camera and screen-sharing controls are separate from microphone input. Enable only the inputs you need and end them when finished. Supported file formats, media behavior, and available models can differ; use the guidance shown in the current control.
Common problems and recovery
- The wrong employee answers: start a new conversation and check the employee selection.
- The employee has not joined: use Reconnect in the connection notice and wait for the employee to become ready. If the notice remains, record the error and contact support. After reconnecting, send a short text test before starting a call.
- A file is still processing: wait and check Results before submitting a duplicate.
- TXT has no inline preview: use the dialog's document-opening option to read the original.
- A ready session has no speech: check the microphone state, browser permission, output volume, and selected voice.
- An answer contradicts a source: preserve the prompt, response, and exact source fact for review.
- Looking for reaction buttons: the checked Chat view provides Copy message. Use the feedback steps above when the reaction control you expected is absent.
Next step
Manage conversation history, or test and improve the employee.